After a lot of back and forth, we decided to do subway tiles in the bathroom, mostly because it was 8:00pm at home depot and I need to start tiling the NEXT DAY!
I got super lucky that the number of tiles I needed for my half wall needed no cuts. Seriously, that was completely not on purpose but I was very happy about it!

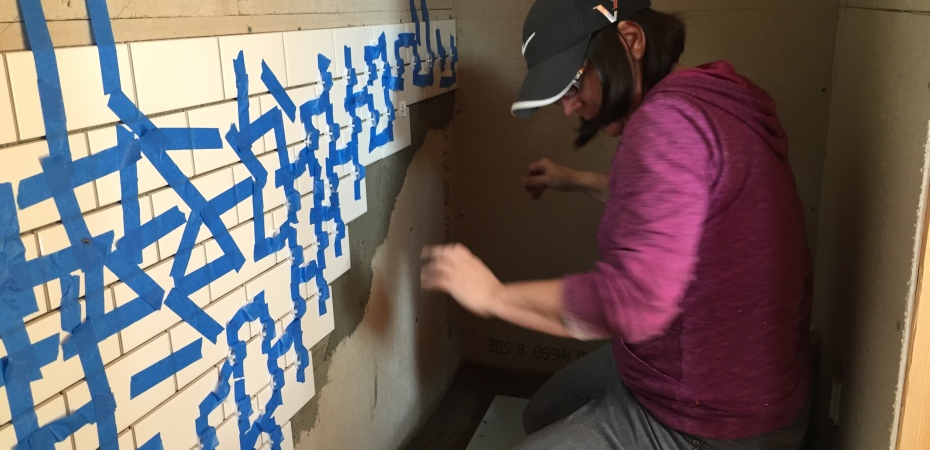
Because my most visible line was mid-wall, we decided to tile top down which is harder to do (the tiles can slide down) but it guarantees a straight line up top without having to play the “mess with the grout line” game later on. As a result, several rolls of tape were part of my “design” (again, not on purpose…). Fortunately, thinset will solidify in 30 minutes, so i just kept rotating the tape.


I was very happy with how straight it came out! That was my first tile job and I learned a lot (i.e. have some pretty funky mistakes). My learning experiences happened mostly behind the toilet, so no harm done.


The floor was a different story… I was on the verge of tears at the end of that one! Mostly because we did the entire floor with a slope to the shower drain (so it’s all waterproof) which led to some really difficult triangular cuts and fittings. Everything around the drain is sloped and mitered.
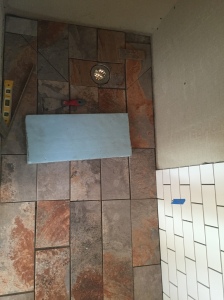
Oh and these porcelain tiles that looks like slate, they are HEAVY! I was exhausted from lifting them up and down (you have to dry fit first) and then lifting them again from the thin set when i made a mistake. Here’s the dry fit.

The drains are really hard to cut on large tiles. I had to redo this one. The first time I tried it,the tile broke on a thin piece.


I got this really nice border to go along with the floor (real slate), again with a sharp learning curce. The tiny pieces kept falling off the mesh and it was hard to set them. Tape to the rescue!


But in the end, I liked the end result. The shower will be finished with a wet concrete look, so we’ll see how it turns out!


